ST guide
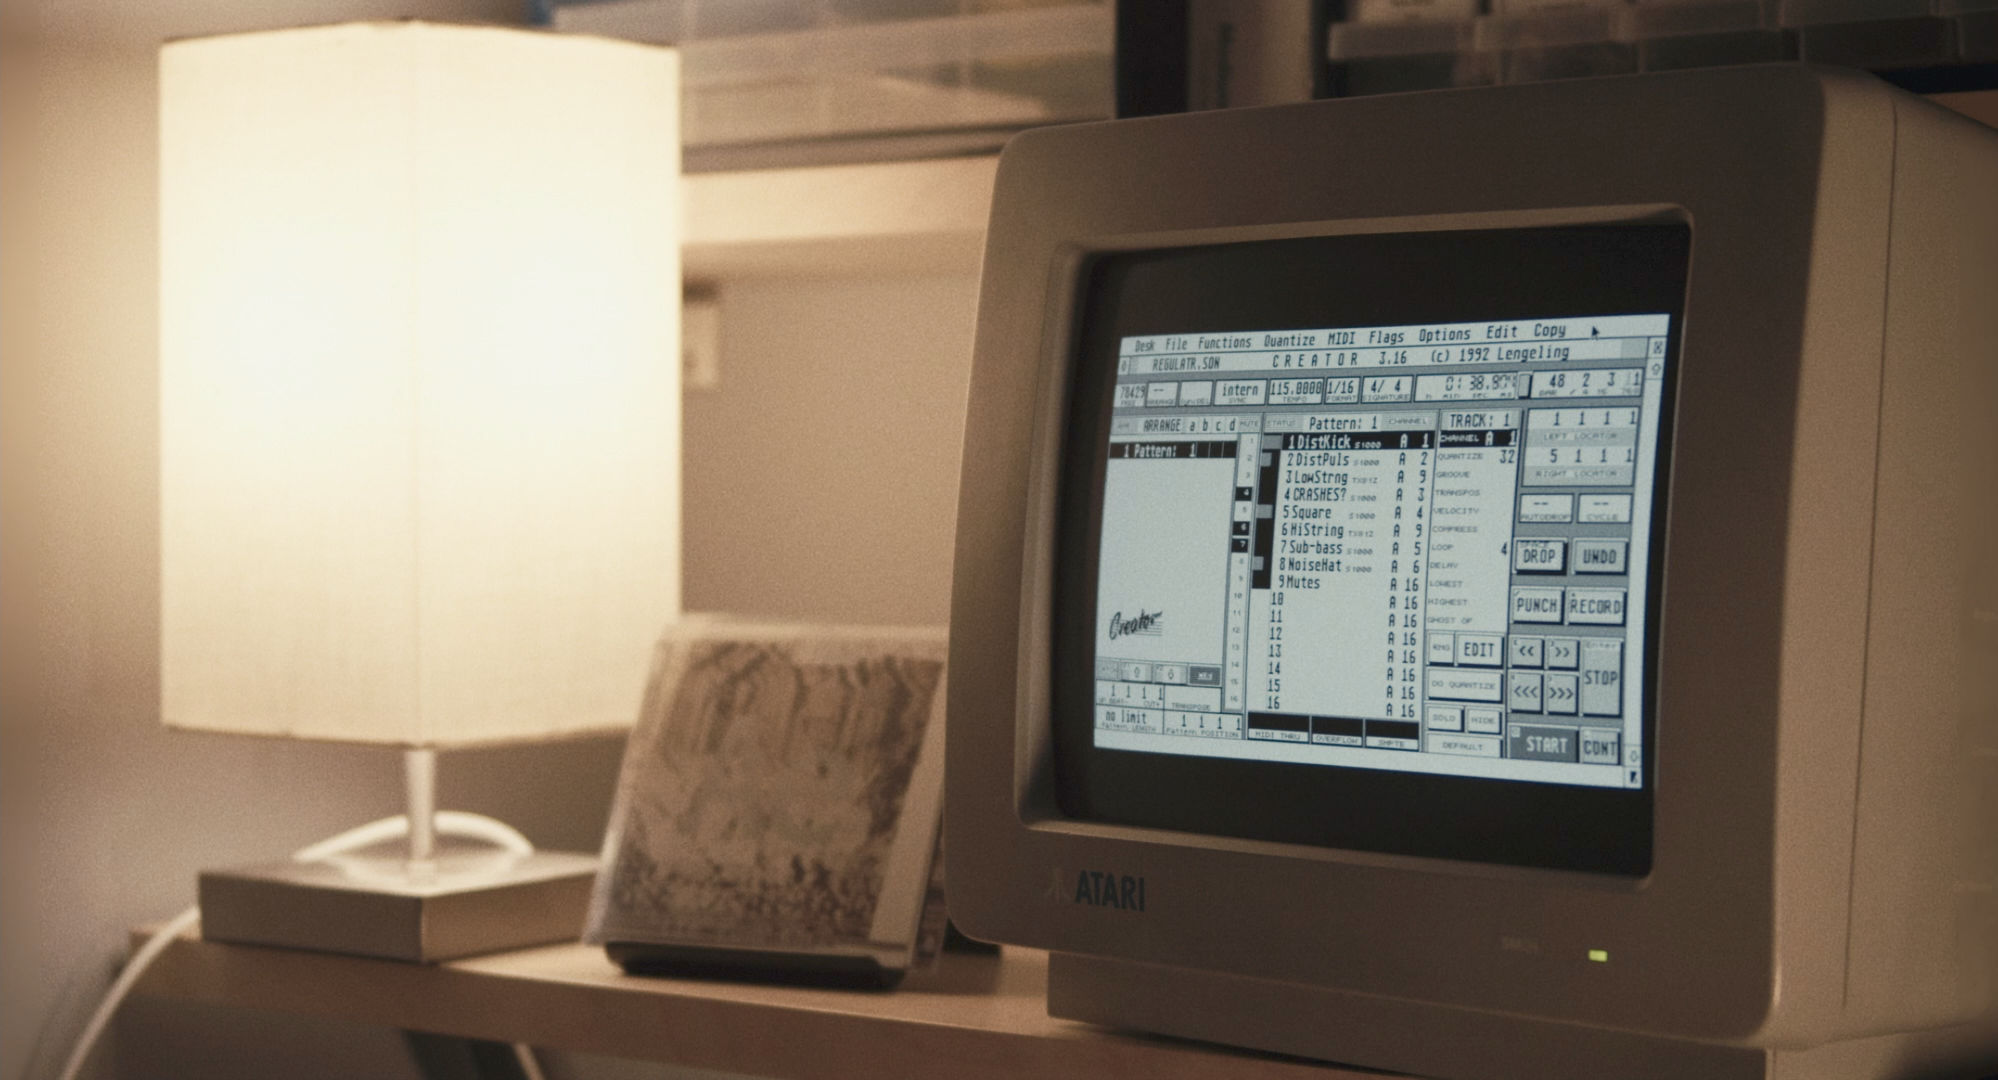
Atari ST running C-LAB Creator
To use an ST to make music these days, you'll need a few things:
- The Atari 1040ST itself
- An Atari SM124 monochrome monitor
- An Atari STM1 mouse
- An UltraSatan drive
As far as the ST is concerned, the drive is a hard drive. In reality, it uses microSD cards, formatted to FAT16. You can use those same microSD cards with 2020s computers just fine, allowing you to copy individual files such as programs and music back and forth. Modern microSD cards have far more storage space than an ST will know what to do with, and the files will be tiny. (A contemporary article recommends buying a hard drive "between 30 and 60 megabytes" in size.[1] UltraSatan acts as multiple drives, each over 500 megabytes.)
If you can only find a controller keyboard with MIDI over USB rather than DIN MIDI ports, you'll also need an adapter, such as Kenton's MIDI USB Host. Note that as the adaptor itself is the host, fulfilling the role of the computer rather than a peripheral, this is more niche and more expensive than the usual kind of MIDI to USB adapter.
Lastly, if you plan on using either of the big two sequencers, Creator or Cubase, then you'll also need the appropriate dongle. Otherwise, there were plenty of budget sequencers which have since been released as freeware.
In use
Most of the GEM interface should be pretty familiar from similar operating systems.
Despite its appearance, it can still only run a single application at a time. In the context of running a MIDI sequencer that requires tight timing, this is arguably a good thing.
Compared to the Mac, the trash icon isn't so forgiving. It's less like a trashcan, and more like a shredder. Drag things there to immediately and permenantly erase them.
Something that caught me offguard at first was how to go up a directory, when loading or saving a file within an application. You simply close the current directory's window, as if revealing its parent directory behind it.
The hard drives will appear with the identifiers C, D, E, F, and so on (A and B are the floppy drives, even if you don't have a second floppy drive). On the desktop, select Options then Install Disk Drive..., enter the appropriate letter, and give it whatever name you'd like. You can rename it later on with the same command. If Install Disk Drive... is greyed out, just select an arbitrary drive first. You can add as many drives onto your desktop as you'd like. To remove any drives cluttering up the desktop, go to Install Disk Drive... again, and this time select Remove instead of Install.
To summarise, as it's pretty unintuitive: Install installs a drive. Install also renames an existing drive. Remove removes a drive. All three options are located within Options then Install Disk Drive..., which you can only get to by highlighting one of the existing drives. (I have no idea how you'd add the drives back if you got rid of them all, so don't do that.)
References
- "How To Become An Atari ST Power User" Martin Russ, Sound On Sound, Aug 1991, pp. 38—42
Electronic music making guides: Aphex Twin guide | Creator guide | DX21 guide | DrumStation guide | MCV-24 guide | MicroVerb III guide | S1000 guide | ST guide | Solina String Ensemble guide